CHAPTER 2 - Introduction to the Features of the Interface
Before introducing the features of EZoApp's interface, let us first watch this video of the basic introduction of EZoApp: ( http://www.youtube.com/watch?v=wzaubtL5az8 )
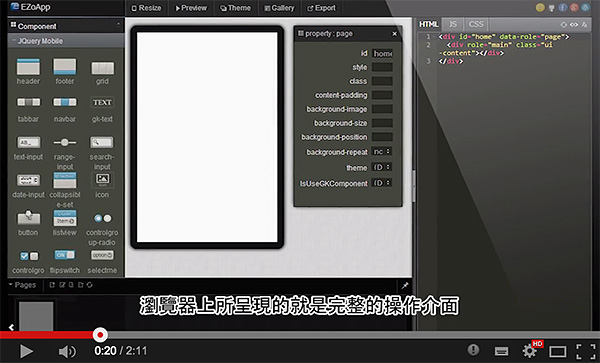
You should now have a basic understanding of EZoApp after watching the video. EZoApp's screen is mainly divided into six areas. They are:
- Function menu
- Component panel
- Editing screen
- Property panel
- Code-editing area
- Pages panel
1. Function Menu
Function Menu is the topmost area. It contains six functions, namely: File, Resize, Preview, Theme, Gallery, and Export, each with its own functionality/functionalities.

- File: Create a New File or Save a file (files in EZoApp are saved automatically; you can add the page as a bookmark or My Favorite.)
- Resize: Rotate and change the dimensions of a cell phone; iPhone and some other common layouts are provided.
- Preview: Preview the design screen.
- Theme: Change the preset style; two options are available.
- Gallery: Offers dozens of examples as references.
- Export: Publish as APK (Android) or download the complete HTML code.
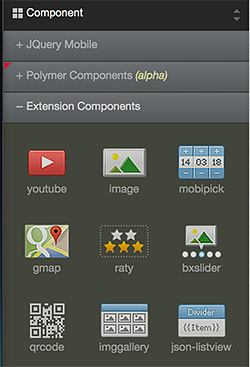
2. Component Panel
The left area is the Component Panel. EZoApp provides many components. If you scroll down, you will discover that there are three types of components: type 1: jQuery Mobile; type 2: Polymer; and type 3: Extension. The following sections will introduce how to work with these components.
3. Editing Screen
The space in the middle is the Editing Screen. Unlike JS Bin, CodePen, or other program testing or sharing platforms, EZoApp gives users a real feeling of developing mobile webpages or apps! Furthermore, this screen is more than just a preview (clicking Preview on top shows the real preview); you can also drag components directly onto the screen and edit them.
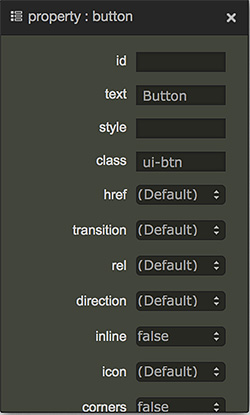
4. Property Panel
Property Panel allows developers to adjust the properties of all of the components; developers can conduct basic modifications without writing any program code.
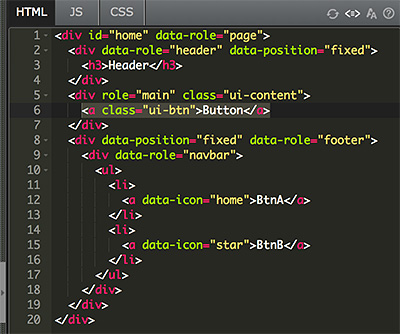
5. Code-editing Area
The right side is the code-editing area. It provides editing areas for HTML, JS, and CSS. You can adjust fonts and use automatic formatting. Many shortcut keys are also available (these will be introduced later).
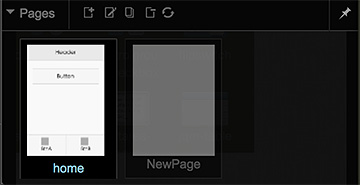
6. Pages Panel
At the very bottom, there is a black bar called Pages. Click to expand it and you will see the thumbnail images of the pages that are being edited. You can also create, edit, move, or delete pages. On the top-right corner of the black bar, there is a thumbtack icon. Clicking on this icon will keep this panel open. If you encountered problems previewing the thumbnails, just refresh the pages.
Continue reading Chapter 3 - Shortcut Keys and Frequently Used Commands
Or Return to Table of Contents